Do you want to add more creativity and depth to your images? Then you’ll love these photography tips for texture images.
What Is Texture in Photography?
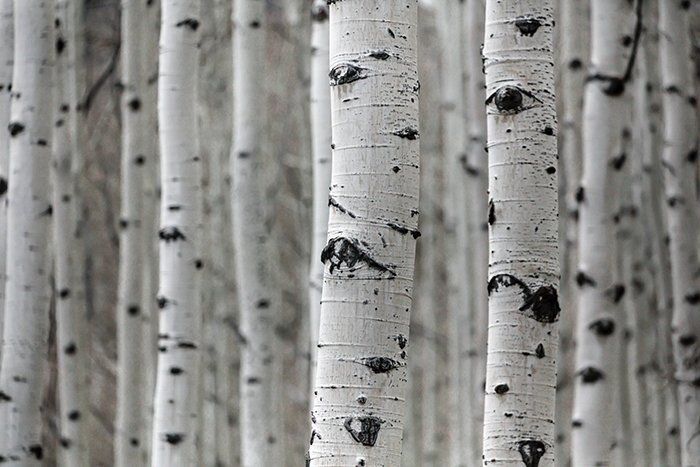
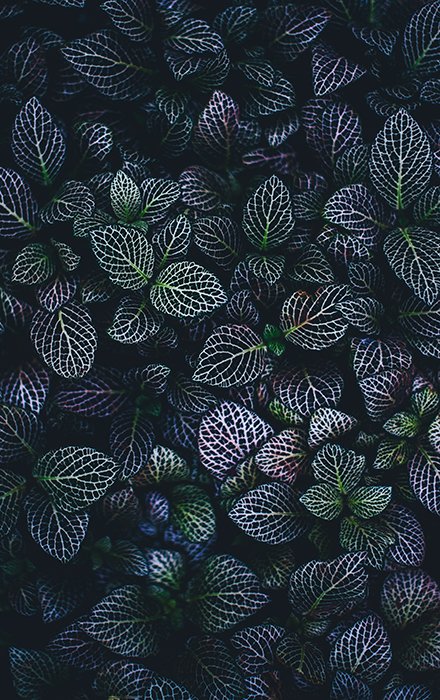
The word texture is familiar to photographers of all kinds. But its meaning might be a little confusing to some. In essence, textures are details that visually describe how something physically feels. Textures can be smooth, rough, and anything else your hand feels when it touches a surface. You can photograph them either from a distance (e.g. a wall covered in graffiti) or up close (e.g. the details on a leaf). In photography, depth, good contrast, and patterns are what defines textures. And you can intensify these in post-processing or an editing program.
How to Photograph Textures – Settings and Camera Tips
The bigger your f-number, the more details your camera will capture. The smaller your f-number, the more blur and bokeh you’ll see in your images. Photos of different textures are usually very detailed and sharp, which means your aperture should be at least f/6. Some people like to photograph pieces of various textures using low f-numbers. This, too, is acceptable in texture photography. Because of this, you can use almost any lens to photograph textures. No matter how still you are, your hands will shake a little when you press the shutter. Minor movements like these don’t matter much in other photography genres.
When it comes to texture photography, though, they determine whether a photo is a success or not. Use a tripod to reduce camera shake when you photograph textures. Unless your aim is to create blurred photos. If you want your photos to be completely clear, use a timer. This will ensure that nothing – not even slight hand movements – will affect the sharpness of your texture shot. If for whatever reason, you want to take photos without standing next to your camera, you can use a remote. These are common with self-portrait photography. But these are valuable to other kinds of photographers too. This small device can either set a timer or help you take a photo from a distance.
How to Find Beautiful Texture Photography
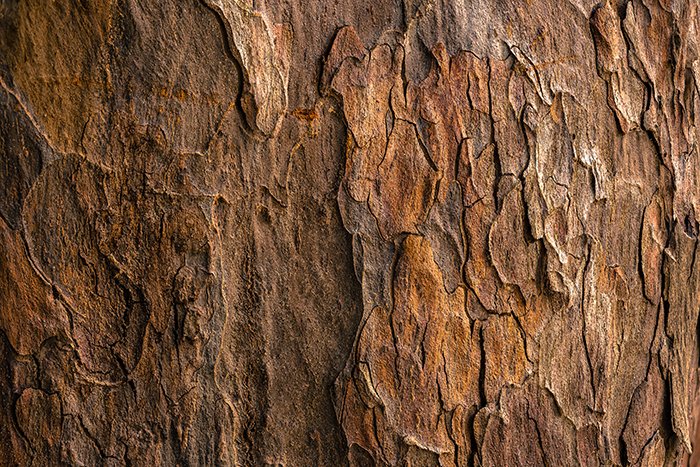
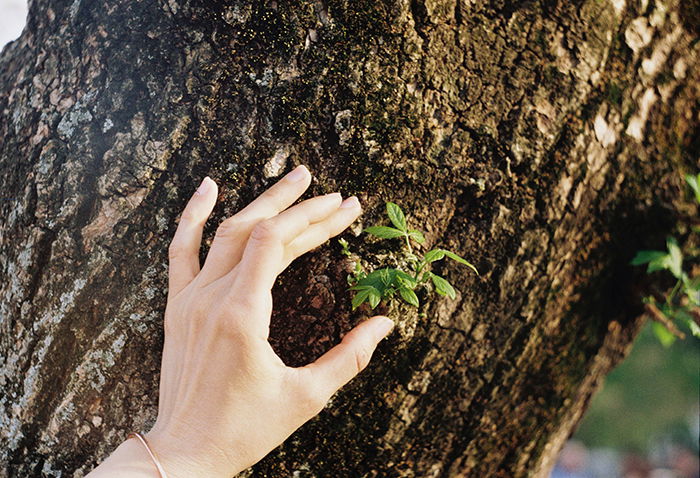
One of the greatest things about textures is that you can find them almost anywhere. The more details you watch out for, the more creative opportunities you’ll discover. Leave your busy social apps at home and go for a walk in your park. Make a mental list of textures that stand out to you. This can be anything from rough surfaces like brick walls, tree bark to less jarring ones like peeling paint. If you don’t want to carry a large camera during your walk, use your smartphone camera. Capture the best locations for a future photoshoot. You can also look for textures at home. Even the most boring-looking room is full of patterns and contrast. These could become the stars of your next photo. Desks, wallpapers, and bedsheets are a few examples of beautiful indoor texture photography. Beaches, thrift stores, libraries, or city streets are also full of great textures.
How to Make Your Own Textures
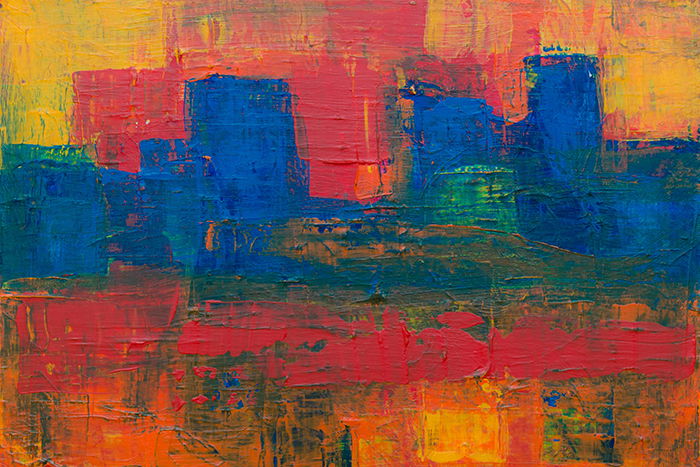
You can make your own textures out of anything you can possibly imagine. Try making an art piece. It doesn’t have to be a masterpiece for you to use it to create eye-catching textures for photography projects. Even an awkward sculpture has textures that could look beautiful in a macro photo. To create your own textures, you can:
make an abstract painting; collect and organize natural objects like pebbles, leaves, or dried flowers; photograph things like flour, feathers, and water in motion.
How to Use Light to Add Depth to Your Textures
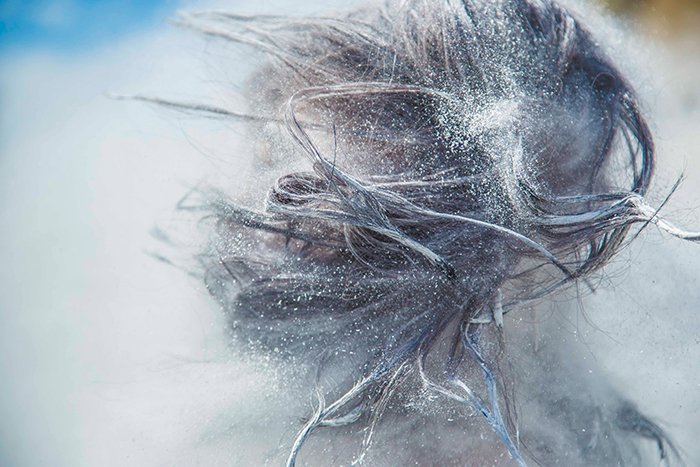
Even the most beautiful textures will look unflattering in the wrong kind of light. Direct light (i.e. midday light) might add too much contrast to your photo. And soft evening light might make it difficult to capture a sharp photo. It will add a lot of grain to your images. You can find the most flattering light between these two extremes. The way textures look changes as the day progresses. This is what makes natural light or ambient light so unpredictable and fun to work with. Sometimes, this unpredictability might get frustrating. Especially if you have a specific atmosphere you’d like to capture. In cases like this, try working with artificial light. Create your own studio using a simple backdrop (even a large sheet of paper will do) and a light source. When you light your subjects yourself, you have more control. This means more time to experiment with angles, contrast, and brightness. If you don’t have professional lighting equipment, you can use a lamp or a torch with a simple light diffuser.
How to Use Texture in Photography Portraits
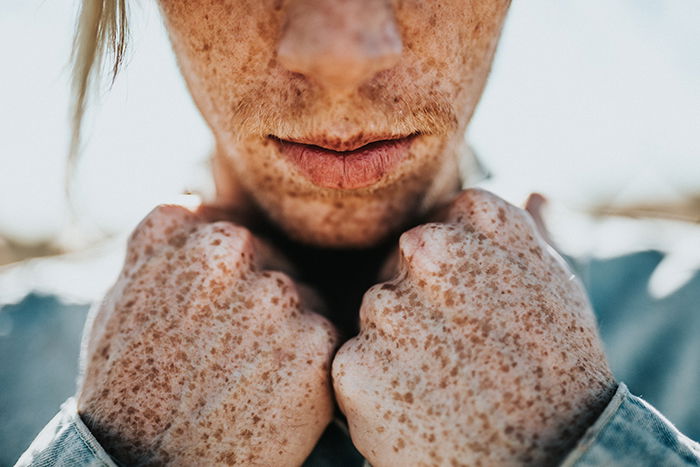
In portrait photography, you can use textures to add more depth, vibrance, and contrast to a face. Human textures include hair, wrinkles, and freckles. Treat human textures the same way you would those found in nature. Photograph them up close, in detail, or from a distance. The more detailed they are, the more striking your photos will look. You can also use textures to enhance a portrait background. Even you’ve blurred a pattern due to depth of field, it can add much-needed contrast to a simple portrait. When selecting appropriate backgrounds for your portraits, watch out for complementary colors. Textures that are too busy or colorful will outshine your subject. Or even ruin your composition. In my experience, pastels, wrinkled surfaces, and plain colors enhance portraits the most.
How to Create Stunning Double Exposures Using Simple Textures
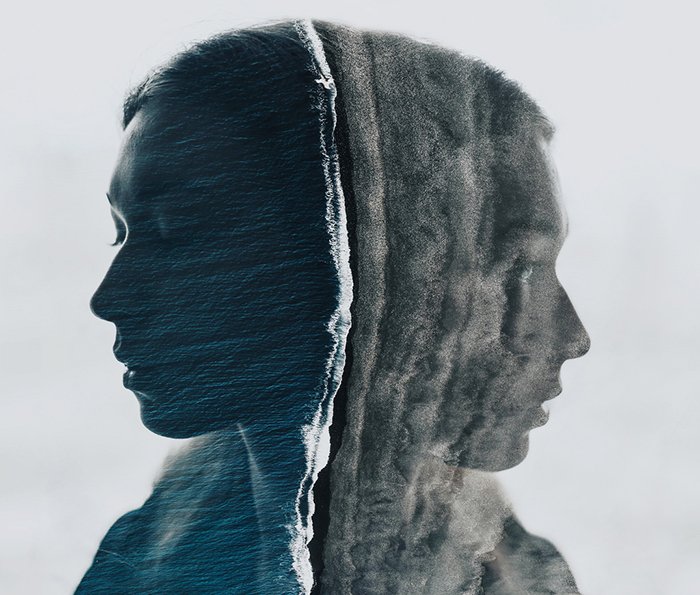
Double exposures consist of at least two merged photos. One of these photos is usually a silhouette. The other is a landscape, portrait, or texture that tells a story through the silhouette. Some of the best double exposures feature gorgeous textures. These make the primary image stand out. During any photoshoot, I spend a few minutes photographing textures and landscapes. These are useful for potential double exposure projects. I then save them in a special resource folder. The photos you collect might not seem useful now, but they’ll definitely come in handy one day. Sometimes, I create double exposures using textures I photographed many years ago!
How to Edit Texture in Photography
You can make your textures look even more outstanding with the help of a few editing tools. I’ll be using Lightroom as an example here, but you can find similar tools in Photoshop and GIMP:
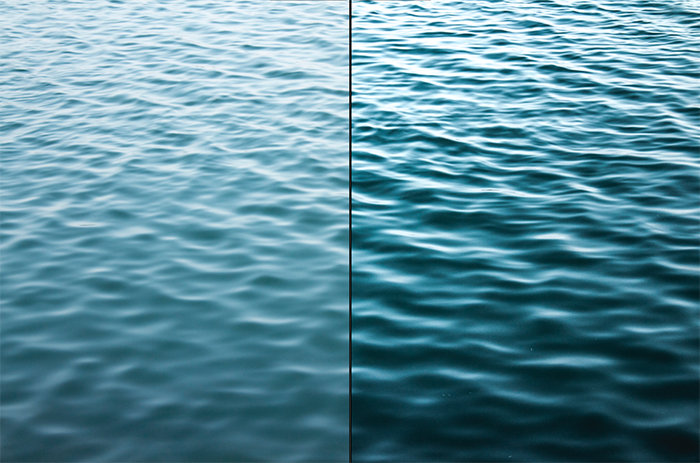
Contrast – This will enhance even the dullest of textures. Move the slider to the right. Make sure you don’t go overboard or else you’ll end up with a dark and oversaturated image. Clarity – This will add depth to every detail in your photo. Don’t be afraid to experiment with it. There aren’t any facial features of distinct locations in your image. This means that a large amount of clarity won’t ruin it. Shadows and Blacks – These are two separate tools that play a similar role in editing programs. If you want to make your texture photography look more atmospheric, move both sliders a little to the left. Blacks, like contrast, will have a more dramatic impact on your photos than shadows.
Capturing texture in photography is a fun hobby. It will enhance your gallery, your photo manipulations, and your appreciation for details. What I love the most about this genre is that it sharpens the senses. The more textures you photograph, the more beauty you’ll find wherever you go. And the more photo opportunities you’ll discover.


title: “What Is Texture In Photography And How To Capture It " ShowToc: true date: “2023-01-27” author: “Neil Burres”
Do you want to add more creativity and depth to your images? Then you’ll love these photography tips for texture images.
What Is Texture in Photography?
The word texture is familiar to photographers of all kinds. But its meaning might be a little confusing to some. In essence, textures are details that visually describe how something physically feels. Textures can be smooth, rough, and anything else your hand feels when it touches a surface. You can photograph them either from a distance (e.g. a wall covered in graffiti) or up close (e.g. the details on a leaf). In photography, depth, good contrast, and patterns are what defines textures. And you can intensify these in post-processing or an editing program.
How to Photograph Textures – Settings and Camera Tips
The bigger your f-number, the more details your camera will capture. The smaller your f-number, the more blur and bokeh you’ll see in your images. Photos of different textures are usually very detailed and sharp, which means your aperture should be at least f/6. Some people like to photograph pieces of various textures using low f-numbers. This, too, is acceptable in texture photography. Because of this, you can use almost any lens to photograph textures. No matter how still you are, your hands will shake a little when you press the shutter. Minor movements like these don’t matter much in other photography genres.
When it comes to texture photography, though, they determine whether a photo is a success or not. Use a tripod to reduce camera shake when you photograph textures. Unless your aim is to create blurred photos. If you want your photos to be completely clear, use a timer. This will ensure that nothing – not even slight hand movements – will affect the sharpness of your texture shot. If for whatever reason, you want to take photos without standing next to your camera, you can use a remote. These are common with self-portrait photography. But these are valuable to other kinds of photographers too. This small device can either set a timer or help you take a photo from a distance.
How to Find Beautiful Texture Photography
One of the greatest things about textures is that you can find them almost anywhere. The more details you watch out for, the more creative opportunities you’ll discover. Leave your busy social apps at home and go for a walk in your park. Make a mental list of textures that stand out to you. This can be anything from rough surfaces like brick walls, tree bark to less jarring ones like peeling paint. If you don’t want to carry a large camera during your walk, use your smartphone camera. Capture the best locations for a future photoshoot. You can also look for textures at home. Even the most boring-looking room is full of patterns and contrast. These could become the stars of your next photo. Desks, wallpapers, and bedsheets are a few examples of beautiful indoor texture photography. Beaches, thrift stores, libraries, or city streets are also full of great textures.
How to Make Your Own Textures
You can make your own textures out of anything you can possibly imagine. Try making an art piece. It doesn’t have to be a masterpiece for you to use it to create eye-catching textures for photography projects. Even an awkward sculpture has textures that could look beautiful in a macro photo. To create your own textures, you can:
make an abstract painting; collect and organize natural objects like pebbles, leaves, or dried flowers; photograph things like flour, feathers, and water in motion.
How to Use Light to Add Depth to Your Textures
Even the most beautiful textures will look unflattering in the wrong kind of light. Direct light (i.e. midday light) might add too much contrast to your photo. And soft evening light might make it difficult to capture a sharp photo. It will add a lot of grain to your images. You can find the most flattering light between these two extremes. The way textures look changes as the day progresses. This is what makes natural light or ambient light so unpredictable and fun to work with. Sometimes, this unpredictability might get frustrating. Especially if you have a specific atmosphere you’d like to capture. In cases like this, try working with artificial light. Create your own studio using a simple backdrop (even a large sheet of paper will do) and a light source. When you light your subjects yourself, you have more control. This means more time to experiment with angles, contrast, and brightness. If you don’t have professional lighting equipment, you can use a lamp or a torch with a simple light diffuser.
How to Use Texture in Photography Portraits
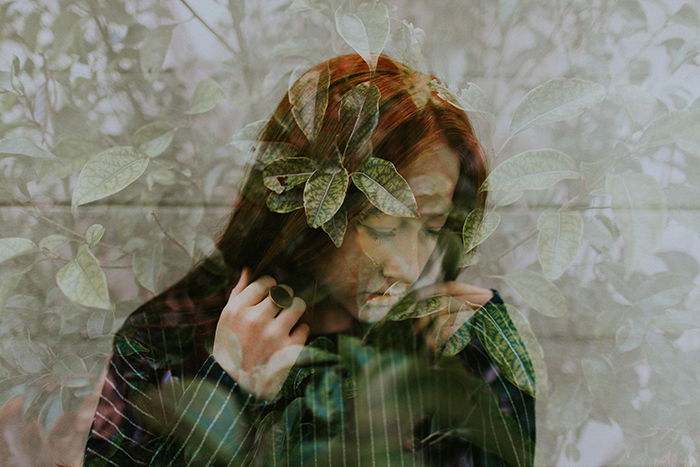
In portrait photography, you can use textures to add more depth, vibrance, and contrast to a face. Human textures include hair, wrinkles, and freckles. Treat human textures the same way you would those found in nature. Photograph them up close, in detail, or from a distance. The more detailed they are, the more striking your photos will look. You can also use textures to enhance a portrait background. Even you’ve blurred a pattern due to depth of field, it can add much-needed contrast to a simple portrait. When selecting appropriate backgrounds for your portraits, watch out for complementary colors. Textures that are too busy or colorful will outshine your subject. Or even ruin your composition. In my experience, pastels, wrinkled surfaces, and plain colors enhance portraits the most.
How to Create Stunning Double Exposures Using Simple Textures
Double exposures consist of at least two merged photos. One of these photos is usually a silhouette. The other is a landscape, portrait, or texture that tells a story through the silhouette. Some of the best double exposures feature gorgeous textures. These make the primary image stand out. During any photoshoot, I spend a few minutes photographing textures and landscapes. These are useful for potential double exposure projects. I then save them in a special resource folder. The photos you collect might not seem useful now, but they’ll definitely come in handy one day. Sometimes, I create double exposures using textures I photographed many years ago!
How to Edit Texture in Photography
You can make your textures look even more outstanding with the help of a few editing tools. I’ll be using Lightroom as an example here, but you can find similar tools in Photoshop and GIMP:
Contrast – This will enhance even the dullest of textures. Move the slider to the right. Make sure you don’t go overboard or else you’ll end up with a dark and oversaturated image. Clarity – This will add depth to every detail in your photo. Don’t be afraid to experiment with it. There aren’t any facial features of distinct locations in your image. This means that a large amount of clarity won’t ruin it. Shadows and Blacks – These are two separate tools that play a similar role in editing programs. If you want to make your texture photography look more atmospheric, move both sliders a little to the left. Blacks, like contrast, will have a more dramatic impact on your photos than shadows.
Capturing texture in photography is a fun hobby. It will enhance your gallery, your photo manipulations, and your appreciation for details. What I love the most about this genre is that it sharpens the senses. The more textures you photograph, the more beauty you’ll find wherever you go. And the more photo opportunities you’ll discover.
