What Are Extension Tubes?
The further away your lens is from the sensor, the closer your lens can focus. For macro photography, you’ll need close focusing. Lens extension tubes extend the magnification of your lenses. They provide an inexpensive and effective starting point in building a macro photography kit. These tubes fit between the camera body and the lens. They twist onto your camera as a normal lens would, and then the lens attaches to their front. Technically, they increase focal length while holding the aperture diameter and the minimum focus distance constant. They allow your lens to focus closer, as the focusing element will be further away from the sensor. Consequently, magnification increases, until it reaches its limit at the minimum focusing distance (MFD). But what exactly is magnification?
Magnification
Magnification is the ratio of the real size of an object compared to its size cast onto the sensor. The maximum magnification of a lens is reached at its closest focusing distance. Most non-macro lenses have a maximum magnification ratio between 1:8 (0.12x) and 1:3 (0.33x). That’s enough for close portraits or product photography, but not enough for macro shots. You can decrease the focusing distance and thus increase the ratio by adding extension tubes.
How to Calculate Magnification
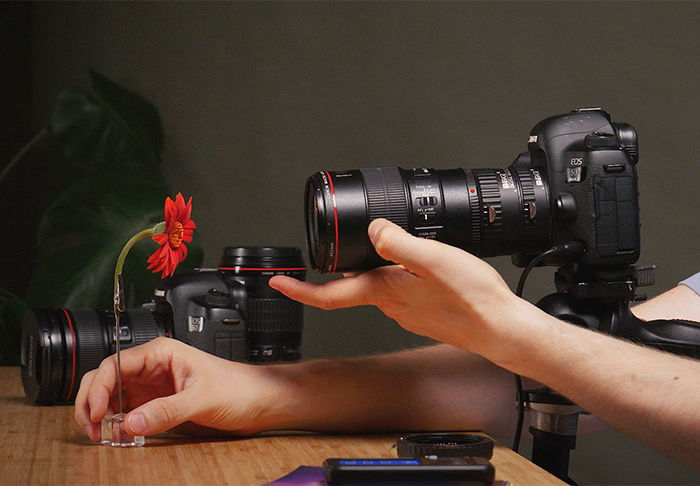
Derived from the general magnification formula, here’s a quick way to calculate the magnification ratio when you add an extension tube: extended magnification = original magnification [in 0.x form] + (length of extension tubes / focal length of lens). Let’s take a look at our favourite lens for macro photography, the Canon 100mm f/2.8 L IS. This lens is capable of 1:1 magnification by default, but we often increase that further with tubes. We like it, especially because calculating its magnification is very easy, thanks to the round, 100mm focal length. Below you see a 25mm and a 12mm extension tube stacked and placed between the camera and the lens. You can simply add them up, so it’s 37mm of extension in total. Let’s substitute the values we know into the formula: M = 1.00 + (37mm/100mm) = 1.37 So, our new magnification, in this case, is 1.37x (or 1.37:1, if you like that form better). Now, if we were to add those same extension tubes onto a 180mm macro lens (1:1, too), the situation would be different. M = 1.00 + (37mm / 180mm) = 1.21 As you can see, the ratio is now only 1.21x. So, the come-off is this: the shorter your lens, the more difference extension tubes make. Add those tubes, for one last time, onto a 50mm lens that has a magnification of 0.25x on its own. This is a type of lens that you probably have in your own kit. M = 0.25 + (37mm / 50mm) = 0.25 + 0.74 = 0.99 ≈ 1 So, you’ve just created a 1:1 ratio macro lens from a plain 50mm lens. Easy, right? To be completely fair, this maths is a bit simplified. As the formula is originally relevant for single thin lenses, some variations can occur. According to the real-world testing done by Shutter Muse, these variations might reach 25-30%, especially with complex zoom lenses. So, to be entirely sure of the performance of your macro system, you should do your own tests.
How to Use Extension Tubes
Extension Tubes Without Electrical Contacts
These are very cheap. The low price, of course, indicates limited possibilities, but they are enough for certain situations. They are lacking electrical contacts to the camera. In general, this means that:
You cannot autofocus them You can’t set the aperture Lens metadata is not transferred The camera will not recognise the lens
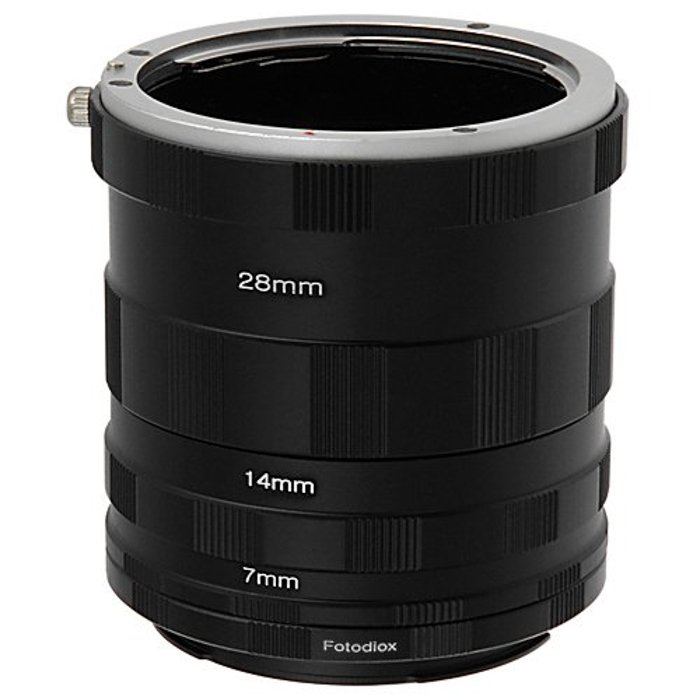
With focus-by-wire lenses (like Canon STM lenses), you can’t even manually focus. If you have such lenses, you’ll need to get different extension tubes. There are modern lenses that allow you to set the aperture manually with a ring. These include the brand-new Sigma 35mm f/1.2 Art, for instance. For such lenses, non-electrical extension tubes pose no problem. Non-electrical extension tubes are best used with lenses that are fully manual by default. Vintage lenses (a Helios 44-2, for example) combined with extension tubes provide a distinctive look to your images. They are very cost-efficient, too. For extension tubes without electrical contacts, we recommend the Fotodiox Canon EOS Macro Extension Tube Set (for Canon EF-mount systems).
With Electrical Contacts
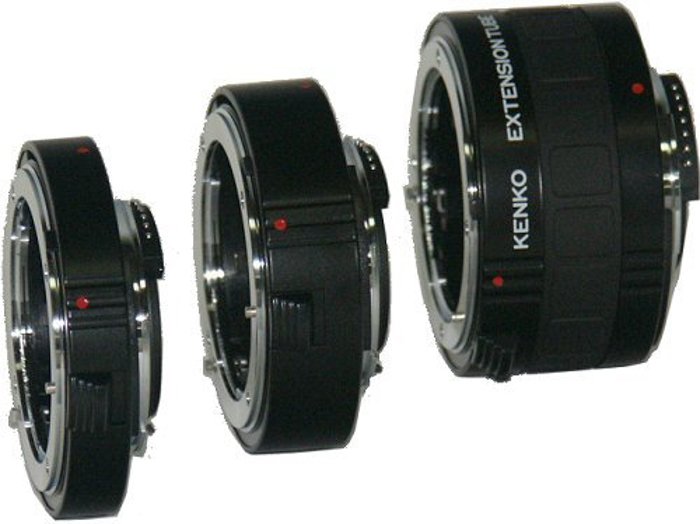
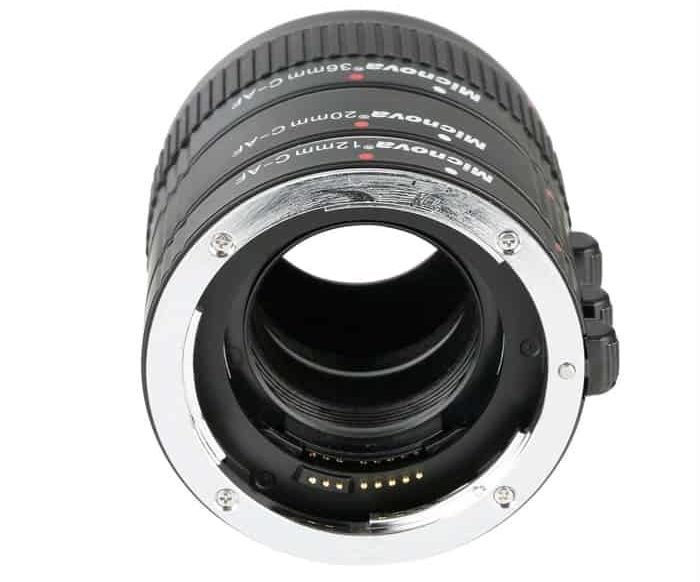
These tubes transfer electronic signals between the lens and the camera body. You can choose between OEM (Original Equipment Manufacturer) and third-party offerings. They are basically the same thing, except the price of the OEM extension tubes could be more than twice the price of the third-party versions. There is nothing very special about these extenders. There are no moving parts or glass. Third-party manufacturers can make products that are just as good as the OEM versions. For OEM extension tubes, we recommend the EF 25 II and EF 12 II for Canon and the PK-13 Ai and PK 11A for Nikon. For third party products, you can’t go wrong with Kenko extension tubes for Canon and Nikon.
Advantages of Extension Tubes
Extension tubes are much cheaper than macro lenses. The whole point of them is to empower lenses you already own to produce life-size macro images. They are also smaller in size than a macro lens. You won’t have to carry around a hefty extra lens just to take a few macro shots. You can use them with lenses that you love (for their special look or handling), but can’t focus close enough with them. Combining a tilt-shift lens with extension tubes can produce extremely unique images, for example. You can also use them with vintage glass.
Disadvantages of Extension Tubes
Extension tubes are less effective with telephoto lenses than with shorter lenses. We’ve seen this in our calculations previously. But there’s a bigger problem. By using lens extension tubes, you trade magnification for light. When you add them, less light will reach the sensor. This is due to increased focal length, and the thus decreased relative aperture. You might be able to account for this by using a wider aperture or a ring flash. It is also possible to raise your shutter speed or ISO, but it may affect your subject if they are moving.
How and When to Use Lens Extension Tubes
The best way to use these lens extension tubes is with manual focus. Do this by using the manual focusing on the subject. Turn on Live View and enable 10x digital magnification for most accurate focusing. The depth of field will be very shallow at this close focusing range. Turn up your ISO, and choose a narrow aperture. This way, you can achieve a deeper depth of field, although at the cost of more noise. If you are able to set up a tripod, you can photograph static objects better. You can keep your ISO low, and your shutter speed longer. You can also set your aperture to where your lens is sharpest and shoot multiple photos while changing focus. Later, you can combine those shots into a single, sharp composite image. This technique is called focus stacking. Using a tripod for moving subjects, such as flowers in the wind or beetles, is not possible. For handheld macro photography, you will need a fast shutter speed to counteract camera shake. You’ll notice that motion blur is much more prevalent when shooting close-up. So, with a 50mm equivalent macro lens, use at least a 1/250sec shutter speed. With a 100mm equivalent lens, 1/500sec should be good. And that’s it. Extension tubes are a simple and cheap way to improve your macro and close-up photography. Now, head out there and take some photos!
For more macro photography tips, check out our posts on taking macro photos of eyes, cool macro ideas or fine art macro!




title: “How To Use Extension Tubes For Close Up Photography Macro " ShowToc: true date: “2023-02-13” author: “Jerry Odom”
What Are Extension Tubes?
The further away your lens is from the sensor, the closer your lens can focus. For macro photography, you’ll need close focusing. Lens extension tubes extend the magnification of your lenses. They provide an inexpensive and effective starting point in building a macro photography kit. These tubes fit between the camera body and the lens. They twist onto your camera as a normal lens would, and then the lens attaches to their front. Technically, they increase focal length while holding the aperture diameter and the minimum focus distance constant. They allow your lens to focus closer, as the focusing element will be further away from the sensor. Consequently, magnification increases, until it reaches its limit at the minimum focusing distance (MFD). But what exactly is magnification?
Magnification
Magnification is the ratio of the real size of an object compared to its size cast onto the sensor. The maximum magnification of a lens is reached at its closest focusing distance. Most non-macro lenses have a maximum magnification ratio between 1:8 (0.12x) and 1:3 (0.33x). That’s enough for close portraits or product photography, but not enough for macro shots. You can decrease the focusing distance and thus increase the ratio by adding extension tubes.
How to Calculate Magnification
Derived from the general magnification formula, here’s a quick way to calculate the magnification ratio when you add an extension tube: extended magnification = original magnification [in 0.x form] + (length of extension tubes / focal length of lens). Let’s take a look at our favourite lens for macro photography, the Canon 100mm f/2.8 L IS. This lens is capable of 1:1 magnification by default, but we often increase that further with tubes. We like it, especially because calculating its magnification is very easy, thanks to the round, 100mm focal length. Below you see a 25mm and a 12mm extension tube stacked and placed between the camera and the lens. You can simply add them up, so it’s 37mm of extension in total. Let’s substitute the values we know into the formula: M = 1.00 + (37mm/100mm) = 1.37 So, our new magnification, in this case, is 1.37x (or 1.37:1, if you like that form better). Now, if we were to add those same extension tubes onto a 180mm macro lens (1:1, too), the situation would be different. M = 1.00 + (37mm / 180mm) = 1.21 As you can see, the ratio is now only 1.21x. So, the come-off is this: the shorter your lens, the more difference extension tubes make. Add those tubes, for one last time, onto a 50mm lens that has a magnification of 0.25x on its own. This is a type of lens that you probably have in your own kit. M = 0.25 + (37mm / 50mm) = 0.25 + 0.74 = 0.99 ≈ 1 So, you’ve just created a 1:1 ratio macro lens from a plain 50mm lens. Easy, right? To be completely fair, this maths is a bit simplified. As the formula is originally relevant for single thin lenses, some variations can occur. According to the real-world testing done by Shutter Muse, these variations might reach 25-30%, especially with complex zoom lenses. So, to be entirely sure of the performance of your macro system, you should do your own tests.
How to Use Extension Tubes
Extension Tubes Without Electrical Contacts
These are very cheap. The low price, of course, indicates limited possibilities, but they are enough for certain situations. They are lacking electrical contacts to the camera. In general, this means that:
You cannot autofocus them You can’t set the aperture Lens metadata is not transferred The camera will not recognise the lens
With focus-by-wire lenses (like Canon STM lenses), you can’t even manually focus. If you have such lenses, you’ll need to get different extension tubes. There are modern lenses that allow you to set the aperture manually with a ring. These include the brand-new Sigma 35mm f/1.2 Art, for instance. For such lenses, non-electrical extension tubes pose no problem. Non-electrical extension tubes are best used with lenses that are fully manual by default. Vintage lenses (a Helios 44-2, for example) combined with extension tubes provide a distinctive look to your images. They are very cost-efficient, too. For extension tubes without electrical contacts, we recommend the Fotodiox Canon EOS Macro Extension Tube Set (for Canon EF-mount systems).
With Electrical Contacts
These tubes transfer electronic signals between the lens and the camera body. You can choose between OEM (Original Equipment Manufacturer) and third-party offerings. They are basically the same thing, except the price of the OEM extension tubes could be more than twice the price of the third-party versions. There is nothing very special about these extenders. There are no moving parts or glass. Third-party manufacturers can make products that are just as good as the OEM versions. For OEM extension tubes, we recommend the EF 25 II and EF 12 II for Canon and the PK-13 Ai and PK 11A for Nikon. For third party products, you can’t go wrong with Kenko extension tubes for Canon and Nikon.
Advantages of Extension Tubes
Extension tubes are much cheaper than macro lenses. The whole point of them is to empower lenses you already own to produce life-size macro images. They are also smaller in size than a macro lens. You won’t have to carry around a hefty extra lens just to take a few macro shots. You can use them with lenses that you love (for their special look or handling), but can’t focus close enough with them. Combining a tilt-shift lens with extension tubes can produce extremely unique images, for example. You can also use them with vintage glass.
Disadvantages of Extension Tubes
Extension tubes are less effective with telephoto lenses than with shorter lenses. We’ve seen this in our calculations previously. But there’s a bigger problem. By using lens extension tubes, you trade magnification for light. When you add them, less light will reach the sensor. This is due to increased focal length, and the thus decreased relative aperture. You might be able to account for this by using a wider aperture or a ring flash. It is also possible to raise your shutter speed or ISO, but it may affect your subject if they are moving.
How and When to Use Lens Extension Tubes
The best way to use these lens extension tubes is with manual focus. Do this by using the manual focusing on the subject. Turn on Live View and enable 10x digital magnification for most accurate focusing. The depth of field will be very shallow at this close focusing range. Turn up your ISO, and choose a narrow aperture. This way, you can achieve a deeper depth of field, although at the cost of more noise. If you are able to set up a tripod, you can photograph static objects better. You can keep your ISO low, and your shutter speed longer. You can also set your aperture to where your lens is sharpest and shoot multiple photos while changing focus. Later, you can combine those shots into a single, sharp composite image. This technique is called focus stacking. Using a tripod for moving subjects, such as flowers in the wind or beetles, is not possible. For handheld macro photography, you will need a fast shutter speed to counteract camera shake. You’ll notice that motion blur is much more prevalent when shooting close-up. So, with a 50mm equivalent macro lens, use at least a 1/250sec shutter speed. With a 100mm equivalent lens, 1/500sec should be good. And that’s it. Extension tubes are a simple and cheap way to improve your macro and close-up photography. Now, head out there and take some photos!
For more macro photography tips, check out our posts on taking macro photos of eyes, cool macro ideas or fine art macro!


